Create & Configure Your Trading Fund
Set up an isolated trading fund with your exchange keys, leverage, position sizing, and the automatic tax bucket.
Have a fully configured fund ready to receive TradingView signals.
Prerequisites
Complete these tutorials first for the best experience:
Go to Funds List → click the purple + Add Fund button in the top-right corner.
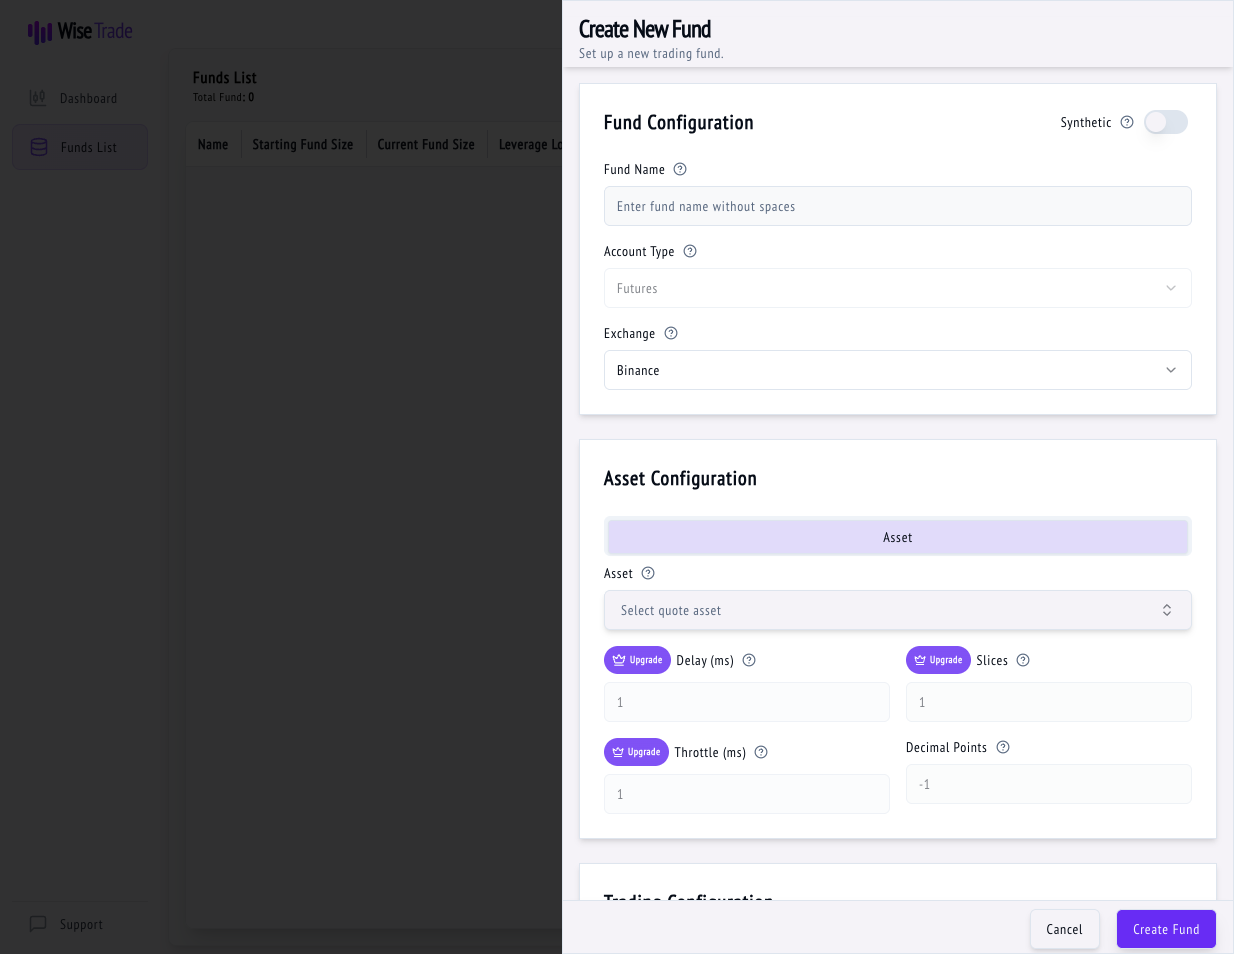
Enter a Fund Name (no spaces, e.g., "MyBTCFund"). The Account Type is always Futures. Choose your Exchange (Binance or Bybit) from the dropdown.
Under Asset Configuration, select the quote asset you'll trade (e.g., BTCUSDT, ETHUSDT). This is the pair your TradingView signals will target.
Under Trading Configuration, set your Leverage Long and Leverage Short (start with 2x–5x if you're new). Enter your Fund Size in USDT — this controls how much capital the fund trades with.
Higher leverage amplifies both gains AND losses. Beginners should start at 2x–3x.
The Tax Percentage field (default 25%) automatically sets aside that percentage of every profitable trade for taxes. Adjust to match your tax rate, or set to 0 to disable.
This is Wise Trade's unique feature. It means you'll never be caught off-guard by a tax bill at year-end.
Paste the API Key and API Secret you copied from your exchange. Click Create Fund. Your fund is now live and waiting for signals!
The "Generate API Keys" link takes you directly to your exchange's API page if you need a new key.
Tips & Best Practices
- Fund names must be unique and cannot contain spaces.
- You can edit fund settings anytime — except the exchange selection.
- Use the Pause button on a fund to temporarily stop it from executing trades.
- Free plan allows 1 fund. Upgrade to Pro for up to 8.
What's Next?
Connect TradingView alerts to Wise Trade so your strategies execute automatically when signals fire.
Upgrade to Pro and unlock advanced features like 8 trading funds, synthetic pair trading, and order slicing.